



Description
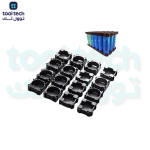
8650 Battery Holder Bracket
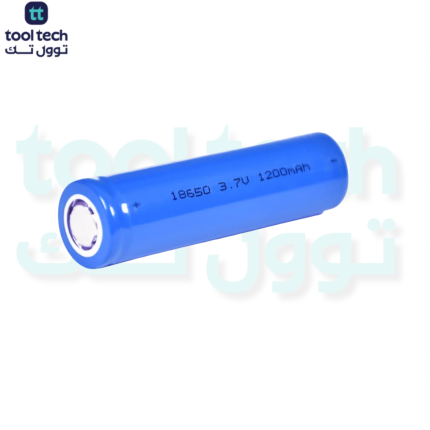
The 18650 Battery Holder Bracket is a modular component used to securely organize and bundle 18650 lithium-ion cells into custom battery packs. By locking individual cells into a rigid, structured matrix, these brackets prevent movement, improve airflow, and provide a professional, clean layout for your battery build.
Technical Specifications
| Feature | Specification |
| Compatible Cell Type | 18650 Lithium-ion |
| Material | Flame-retardant ABS or PC plastic |
| Configuration | Available in various matrices (e.g., 1×2, 2×3, 3×4) |
| Interlocking | Yes (often feature slot-and-groove sides for expansion) |
| Venting | Integrated channels for thermal dissipation |
| Diameter (Inner) | ~18.5mm (Standard fit for 18650 cells) |
Key Functions & Benefits
-
Structural Integrity: Lithium-ion cells are susceptible to damage from vibration and impact. These brackets hold the cells firmly in place, ensuring the spot-welded or soldered connections do not experience mechanical stress that could cause them to break.
-
Thermal Management: By maintaining a specific, uniform distance between cells, the brackets ensure air can circulate between them. This prevents “hot spots” within the battery pack, which is critical for safety and cell longevity.
-
Organization: They simplify the assembly of complex series-parallel (S/P) configurations. Whether you are building a 3S5P or a 10S10P pack, these holders keep your cell arrangement orderly, making it easier to route nickel strips and balance wires.
-
Fire Safety: High-quality brackets are typically made from flame-retardant materials, providing an extra layer of protection in the event of a thermal runaway incident.
Best Practices for Assembly
-
Inspection: Before placing cells into the brackets, inspect the PVC heat-shrink wrap on each cell. If a cell has a tear or nick in the wrap, it must be re-wrapped before assembly to prevent short circuits against the nickel strips.
-
Expansion: For large packs, use the interlocking side features to build a single “monolith” block. Once the cells are inserted, you can add a layer of Kapton tape or fish paper for additional insulation.
-
Nickel Strip Alignment: Use the brackets to plan your nickel strip routing. Ensure your nickel strip width is appropriate for the current draw of your pack; the brackets provide the perfect spacing to prevent overlapping or accidental shorts between strips.
-
Final Encapsulation: After welding, wrap the entire completed block in heat-shrink tubing to protect the assembly from moisture and debris.

















Reviews
There are no reviews yet.